Setting up a funnel
The fastest way to get a funnel out into the world is to start with a Smart funnel. Building from scratch with a Custom funnel is also an option when you want full control.
Option 1: Use a Smart funnel
- Tap Funnels at the bottom of the app, then tap the Smart tab.
- Browse the list and tap one that fits what you want to share.
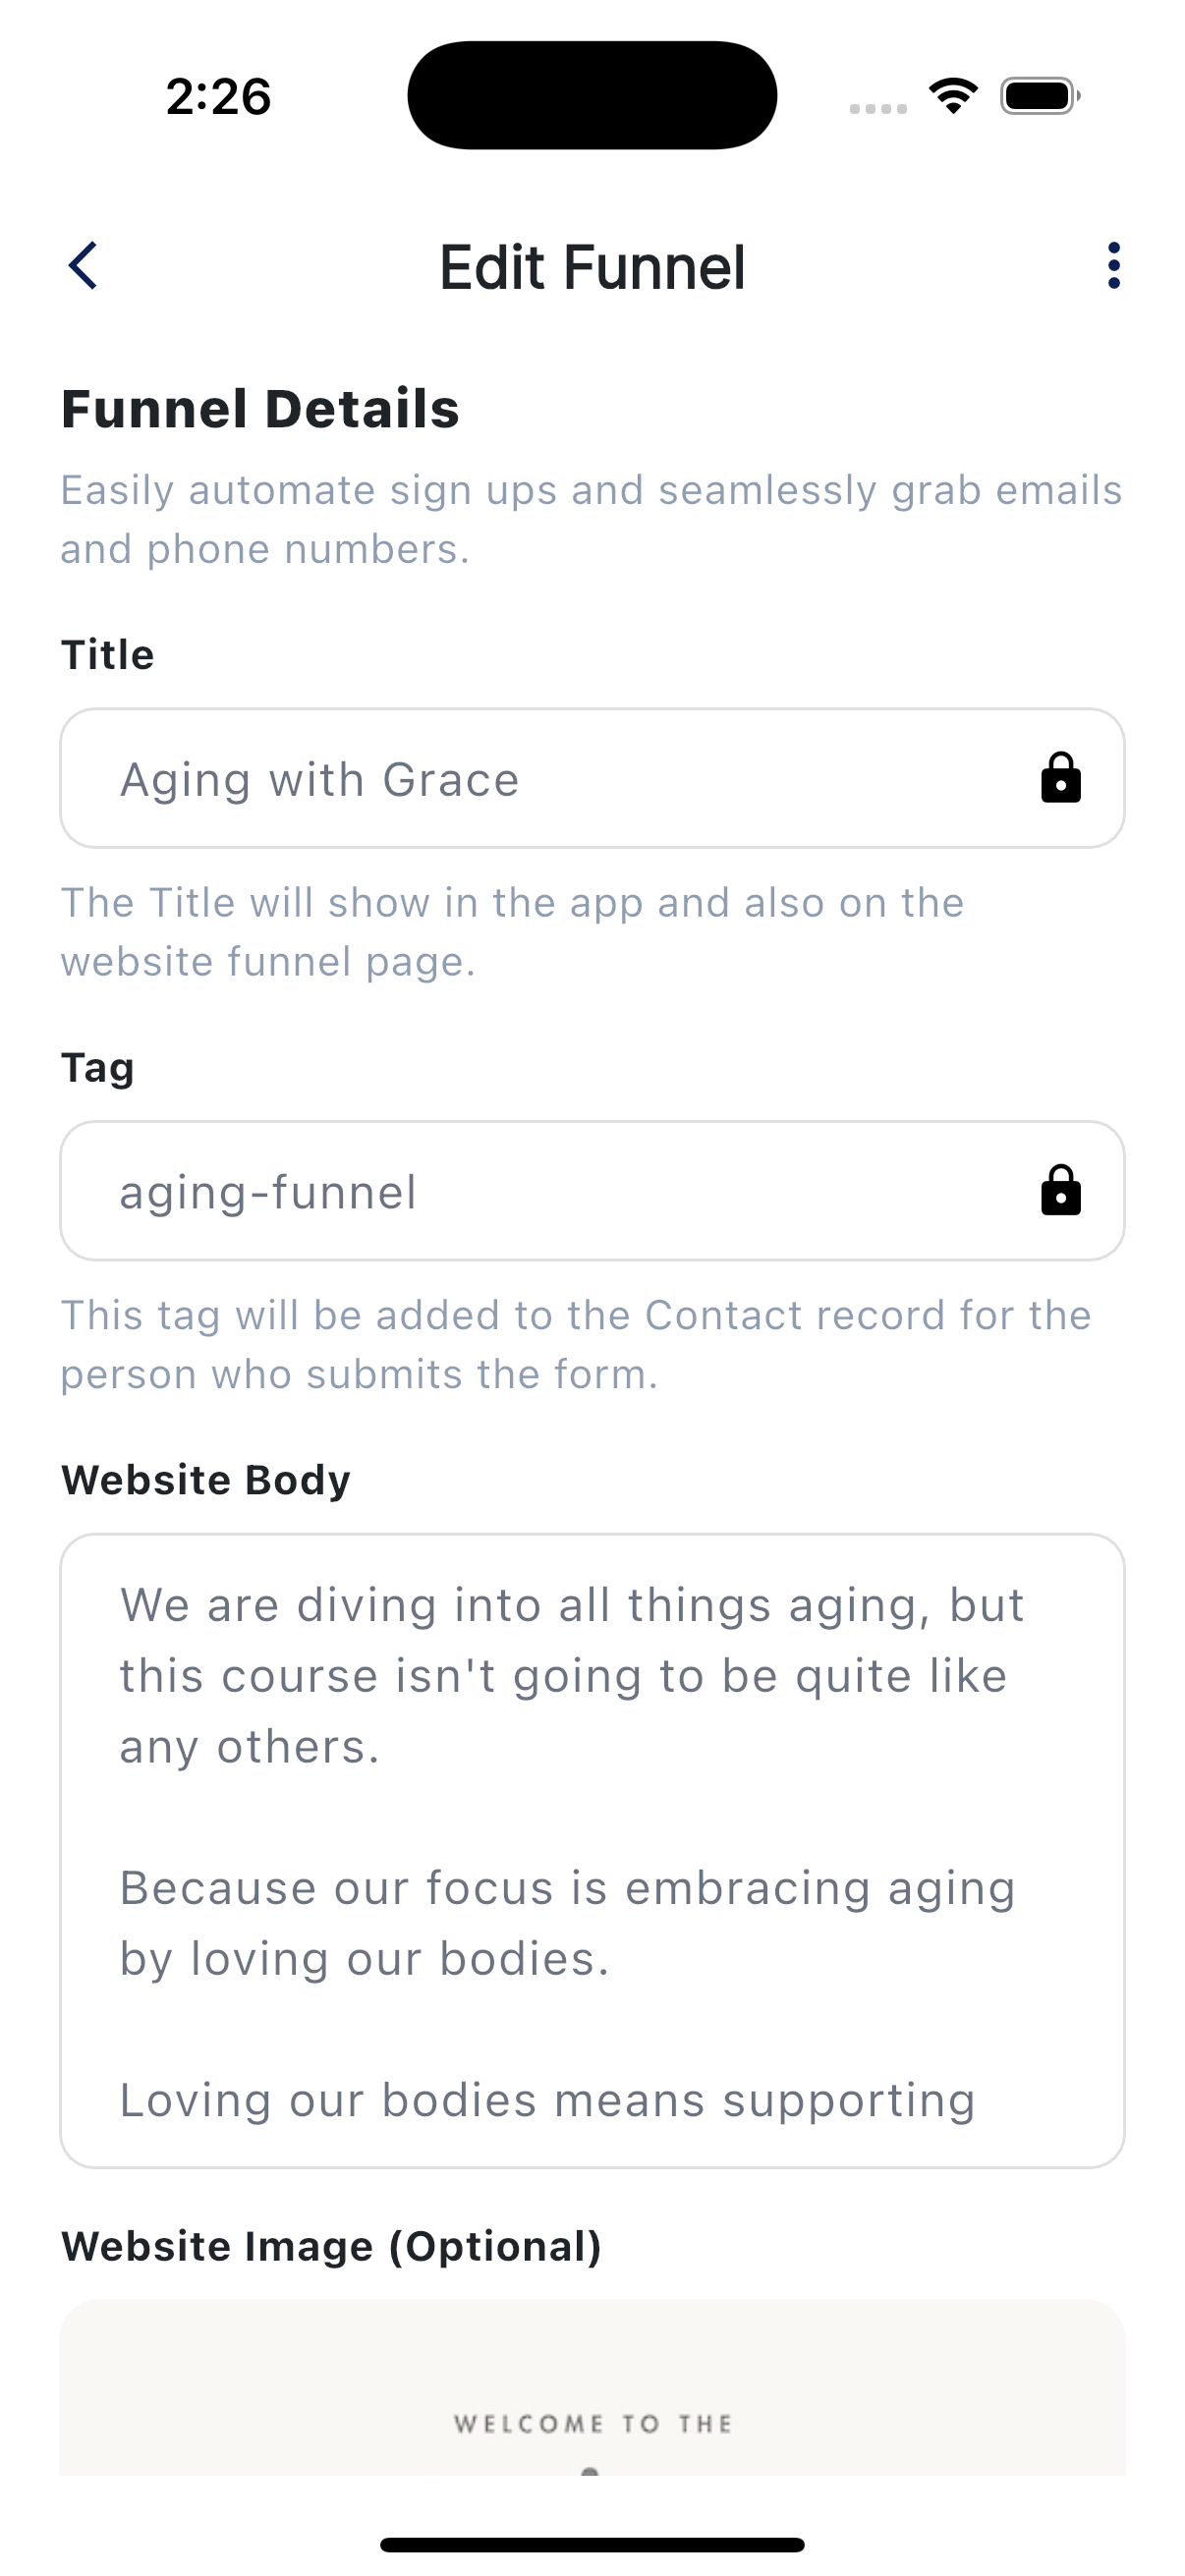
- Tap Duplicate in the top corner. (Smart funnels are read-only as templates. Duplicating gives you your own editable copy.)
- The screen title becomes Edit Funnel. Customize:
- The Title (the example placeholder is "Funnel Title * (e.g. Free Wellness Guide)")
- The Website Body copy (the description on the page)
- The header image if you want a different one
- The Tag that gets applied to anyone who signs up
- The auto-reply text so it sounds like you
- The email subject and body if you want email follow-up
- An attached resource if you want to include a download with the email
- Save. Your funnel is live and ready to share.
Option 2: Build a Custom funnel
- Tap Funnels → Custom, then tap + (tooltip "Add Funnel").
- The Create Funnel screen opens.
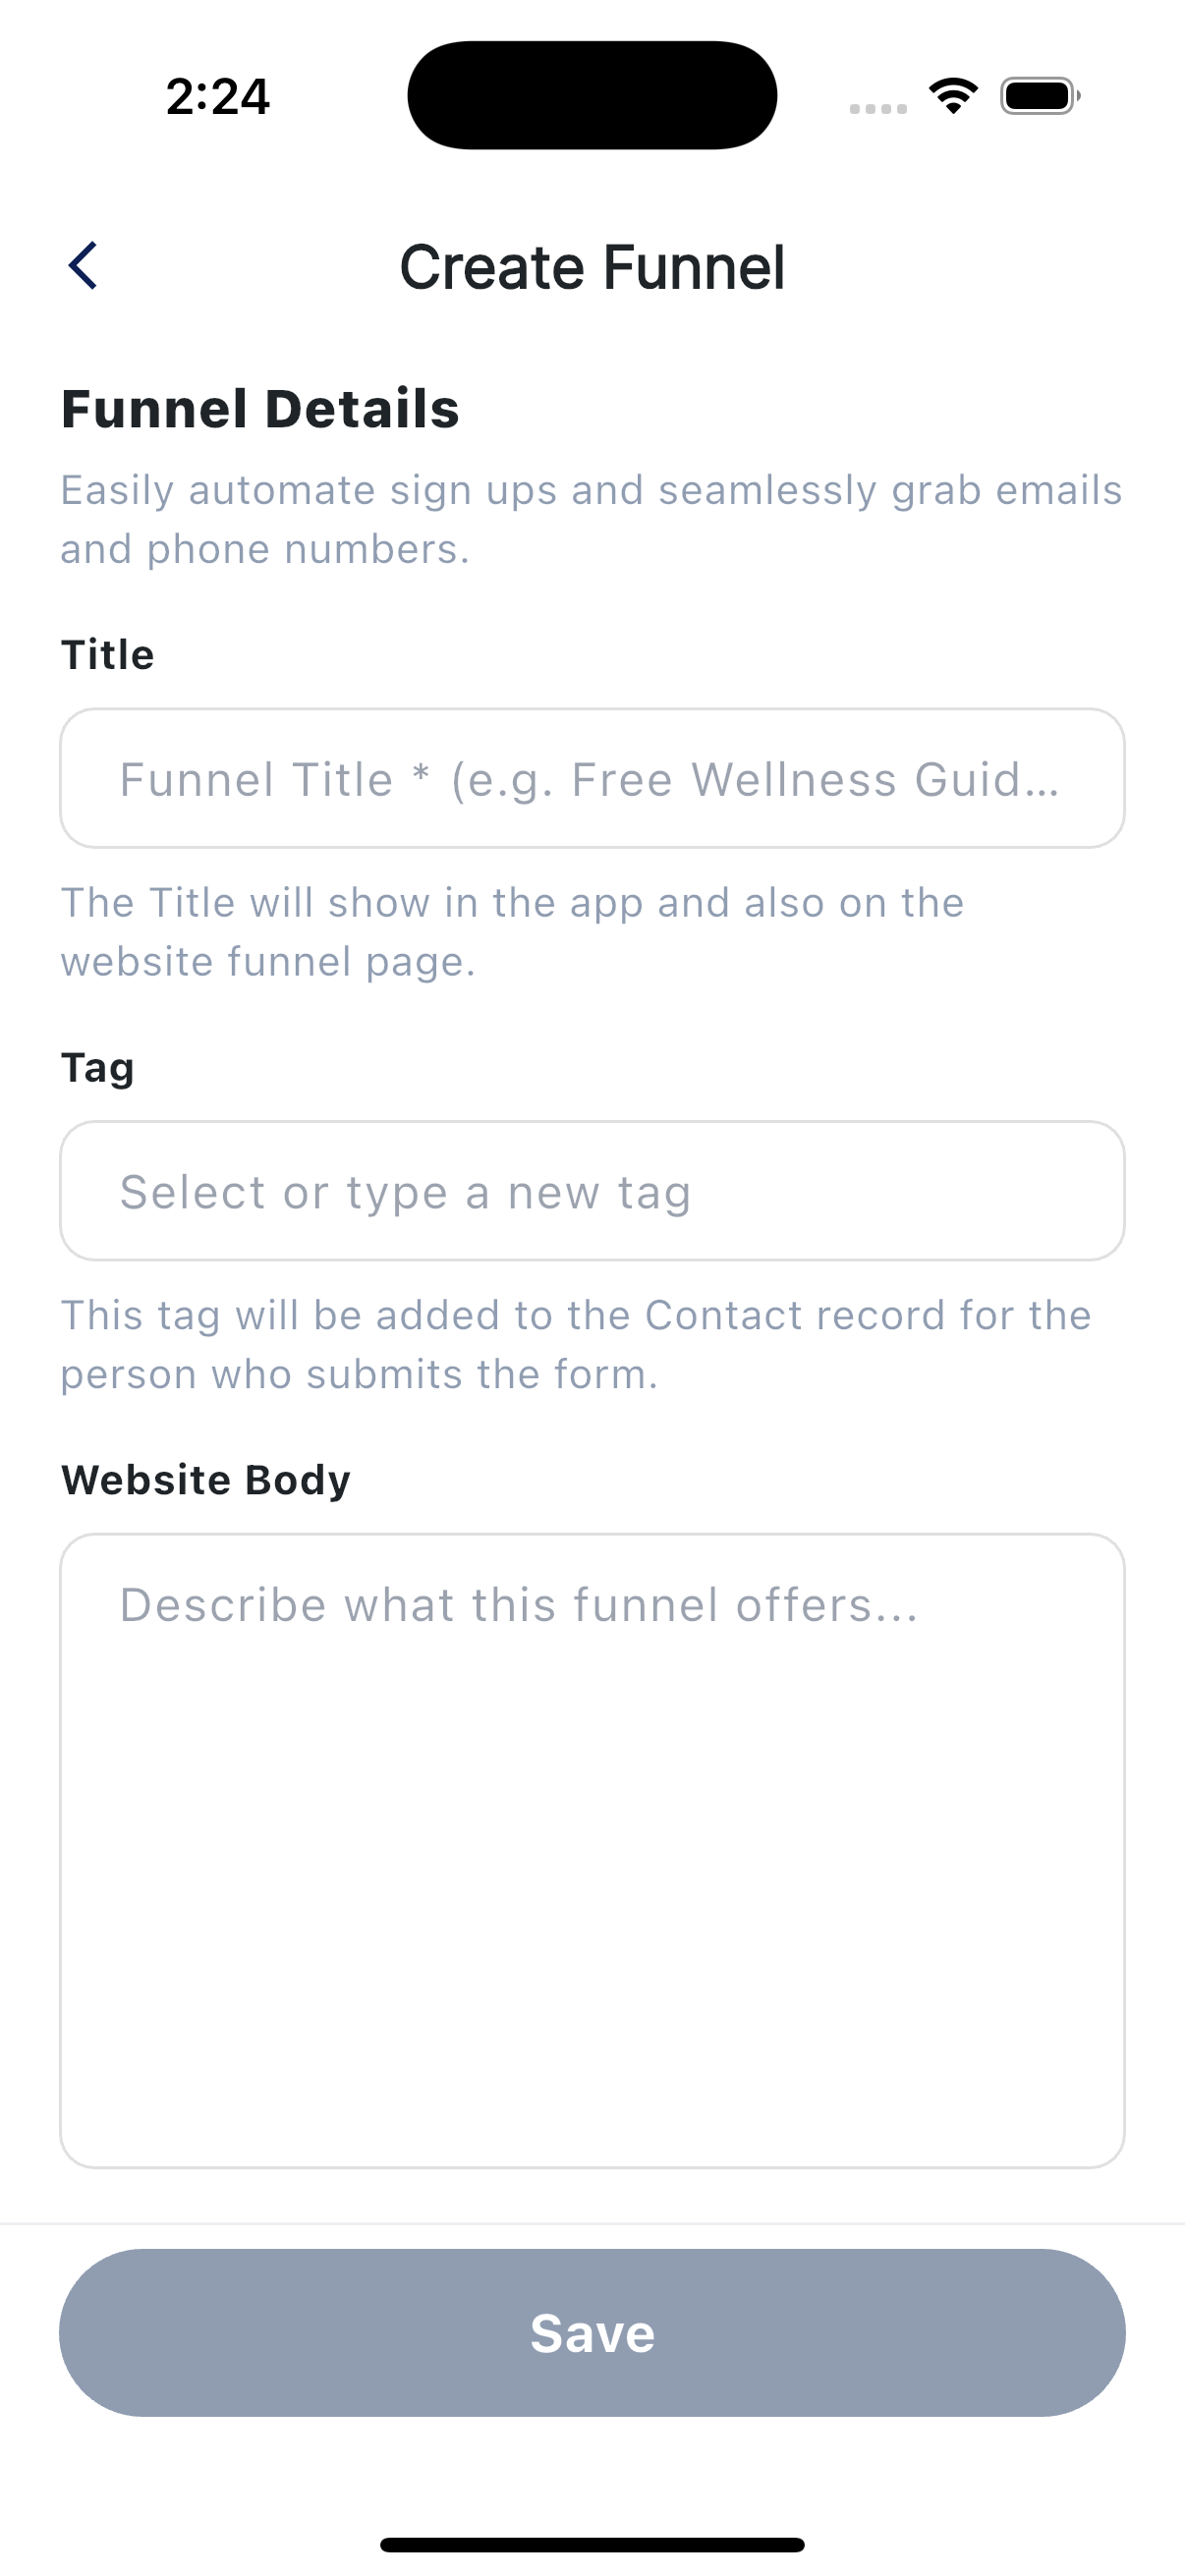
- Fill out the Funnel Details section:
- Title. The big headline at the top of the page. Helper text reads "The Title will show in the app and also on the website funnel page."
- Website Body. Your description or pitch (placeholder "Describe what this funnel offers...").
- Tag. A short label that gets added to anyone who signs up (placeholder "Select or type a new tag").
- Header image. Optional but it makes a big difference.
- Auto-reply text. Sent the moment someone fills out the form.
- Email subject (placeholder "Enter email subject line") and email body. Optional, sent if they provided an email.
- Resource. Optional download attached to the email.
- Save.
Sharing your funnel
After you save, you'll see an option to copy the form link for your funnel. Share it anywhere: Instagram bio, in a text, in your email signature, in a class.
A few good practices:
- Use a memorable title. It's what people see first.
- Test it yourself. Open your funnel from your own phone, fill it out, and confirm the auto-reply lands and the contact shows up in your account.
- Reinforce the opt-in. A short line in your body copy like "You'll get a text from me with the details" helps people know what to expect.
Pairing with a Drip campaign
A funnel sends one auto-reply. If you want a longer follow-up, a thoughtful sequence over a few days, set up a Drip campaign that uses your funnel as the trigger. Now everyone who signs up walks through your sequence automatically without you lifting a finger per lead.
Editing later
You can edit a Custom funnel any time. Changes show up immediately for new visitors. People who already signed up don't get re-messaged.